
The calendar view gives you a clear, visual overview of your work per day and time. It helps you understand how your week is structured, spot gaps or overlaps, and review your timesheet more easily. You can switch to the calendar view from the top right of your timesheet.

Views: Week and Day
The calendar offers two ways to explore your time entries:
Week view
Shows your week in a horizontal timeline, making it easier to see when work happened and how your days compare. This view also displays your external calendar events when integrations are enabled.
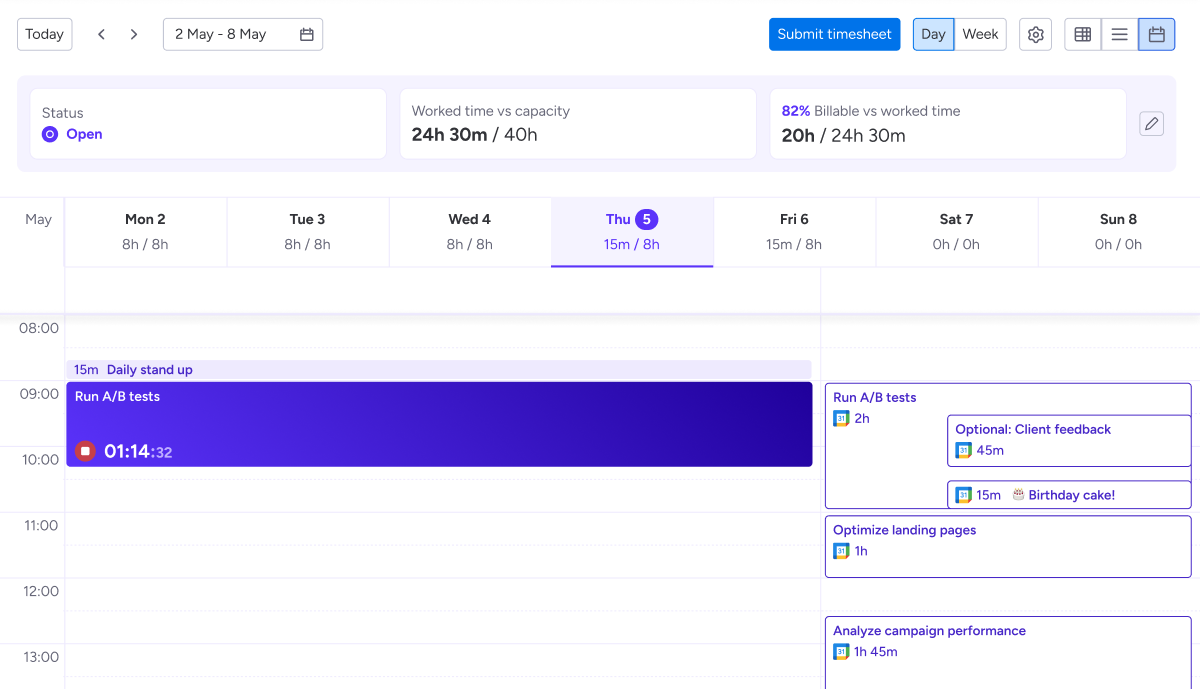
Day view
Gives the most detailed timeline, ideal when you’re working with external events or when you have a lot of short time entries on a day.
Switch views using the menu in the top right corner of the calendar, or by clicking on the days in the calendar header.
Adding time
You can add and organize time entries directly in the calendar view.
-
Click anywhere in the calendar to create a new time entry.
-
Time entries without a time frame appear in a separate row at the top of each day. Drag and drop an unscheduled entry from the top row into the calendar to give it a time frame.
-
If a day has more than three unscheduled entries, only the first three are shown. Click the more button or the arrow on the left of the calendar to reveal hidden entries.
Edit time entries
Once a time entry has been added to the calendar, you can update it by dragging or resizing:
-
Drag the entry to another day or time slot to change when it happened.
-
Drag the top or bottom edge to make the entry longer or shorter.
-
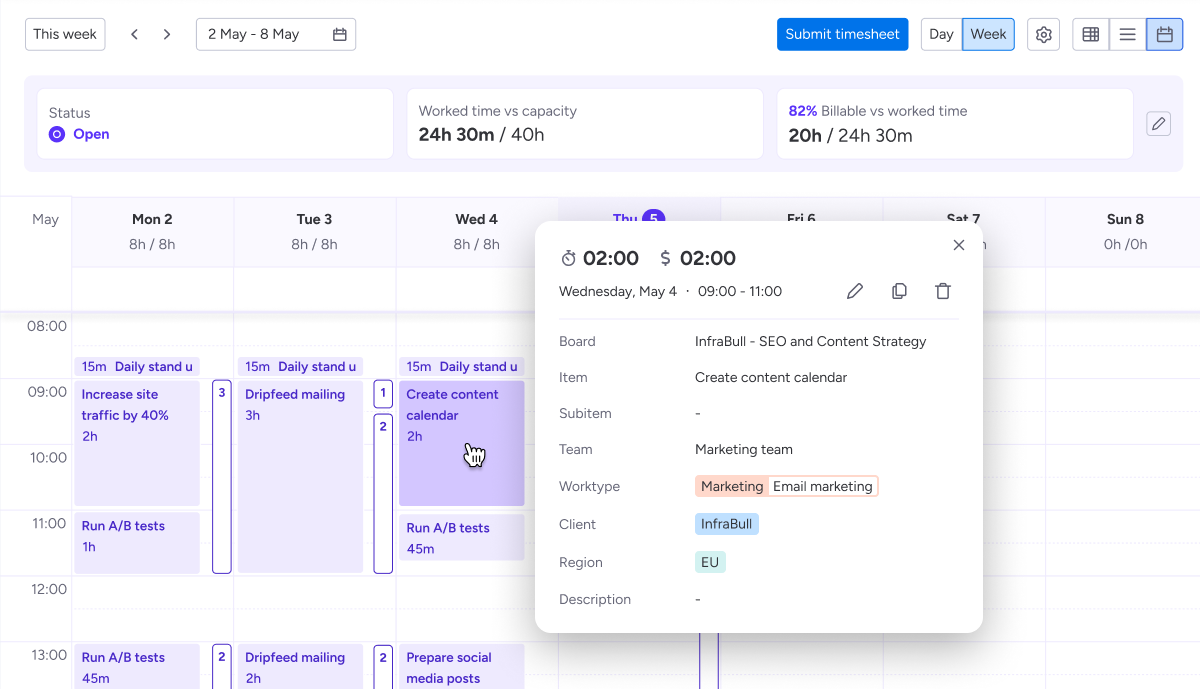
Click on a time entry to open a pop-over with full details. From here, you can:
-
Edit the entry
-
Duplicate it
-
Delete it
-
Using external calendar events
When you connect your Google or Microsoft calendar, your events appear in the Tracket calendar.
How events are displayed
Week view
-
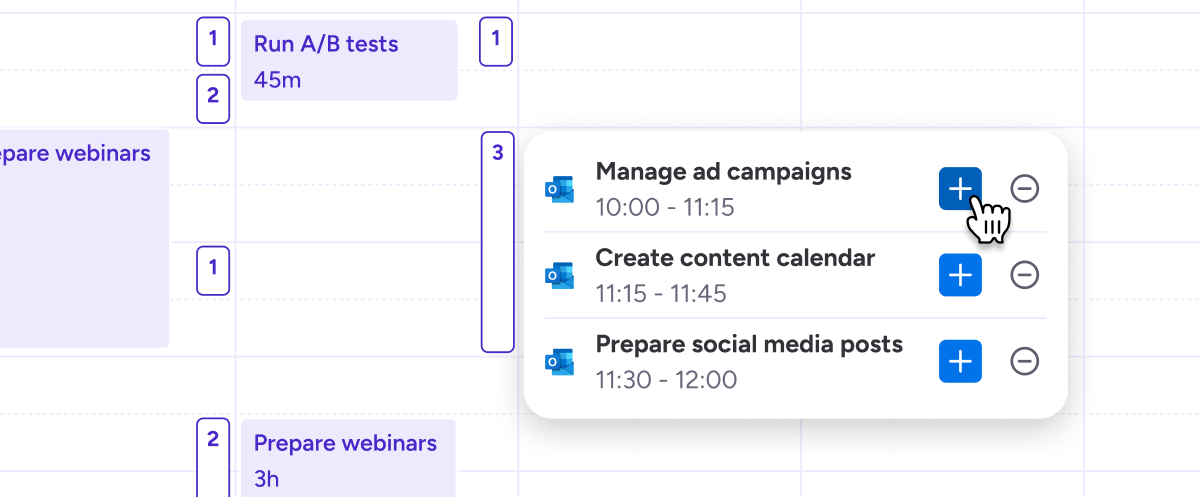
Events that overlap or fall within the same time window are grouped into event lines.
-
Each line shows how many events it contains.
-
Select a line to open and review the individual events.
Day view
-
Events appear as individual blocks in the timeline.
-
You see the exact duration and placement of each event.
Create time entries from events
-
Select an external event to open its details.
-
In week view you first select an event line, then choose the blue Add button next to the event you want to log time for.
-
In day view you click on the event directly in the calendar.
-
-
Complete the time entry template and save it.
Hide unwanted events
You can hide external events from your timesheet in the week view.
-
Select an event line to open the events inside it.
-
Next to each event you’ll see the hide icon. Select this icon to remove the event from your calendar.
Once an event is hidden, it no longer appears in your calendar or as a suggestion for logging time. When you hide a recurring event, all future occurrences are hidden as well.
Choose which calendars appear
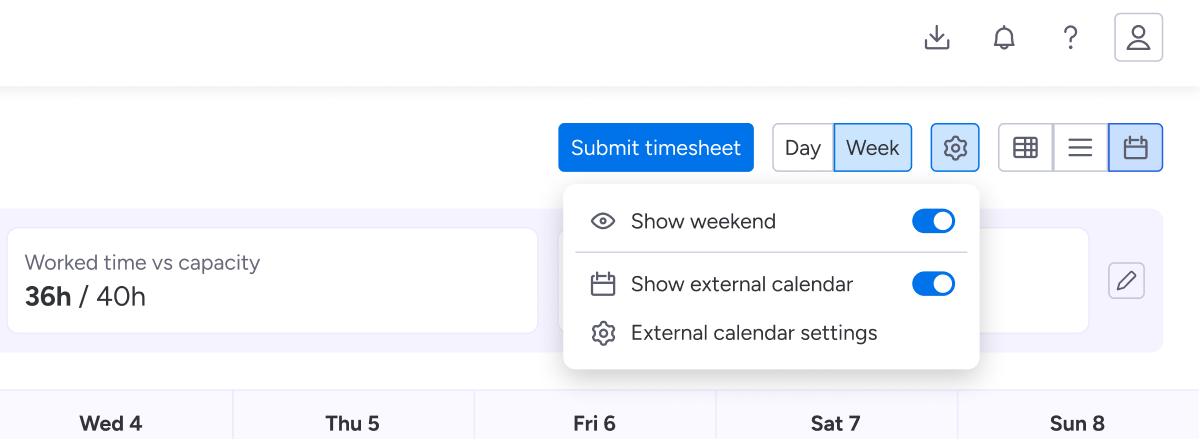
Use the settings icon at the top of your timesheet to control what is shown in your calendar.
From here you can:
-
Toggle weekends on or off.
-
Show or hide your external calendars in the timesheet once a calendar is connected.
-
Navigate to your external calendar settings.
Hiding an external calendar does not disconnect it. It only changes what you see in the timesheet, so you can switch visibility whenever you need more focus or a clearer overview.
You manage the actual calendar connections on your personal integration settings page. Learn more about how to set up external calendars ➜
Timers
Timers that are started in other views also appear in the calendar. You can stop them directly from this view. It is not yet possible to start a new timer from the calendar.