Render an XSD as a table
1 Add the XSD file as attachment to Confluence
Open the edit mode of Confluence page where you want to render the XSD table. Click on files and images and locate the XSD schema on your computer and upload it to your Confluence page.
You don’t have to attach the same XSD file for every page where you want to use the macro. Once your XSD file is attached, the plugin can search through spaces and pages for your attachment.
2 Macro
Edit the Confluence page where you want to use the plugin. Start typing {xsd. Two options of the XSD-Viewer plugin will show up:
XSD image
XSD table
Select (2) XSD table to start rendering a table.
3 Macro panel
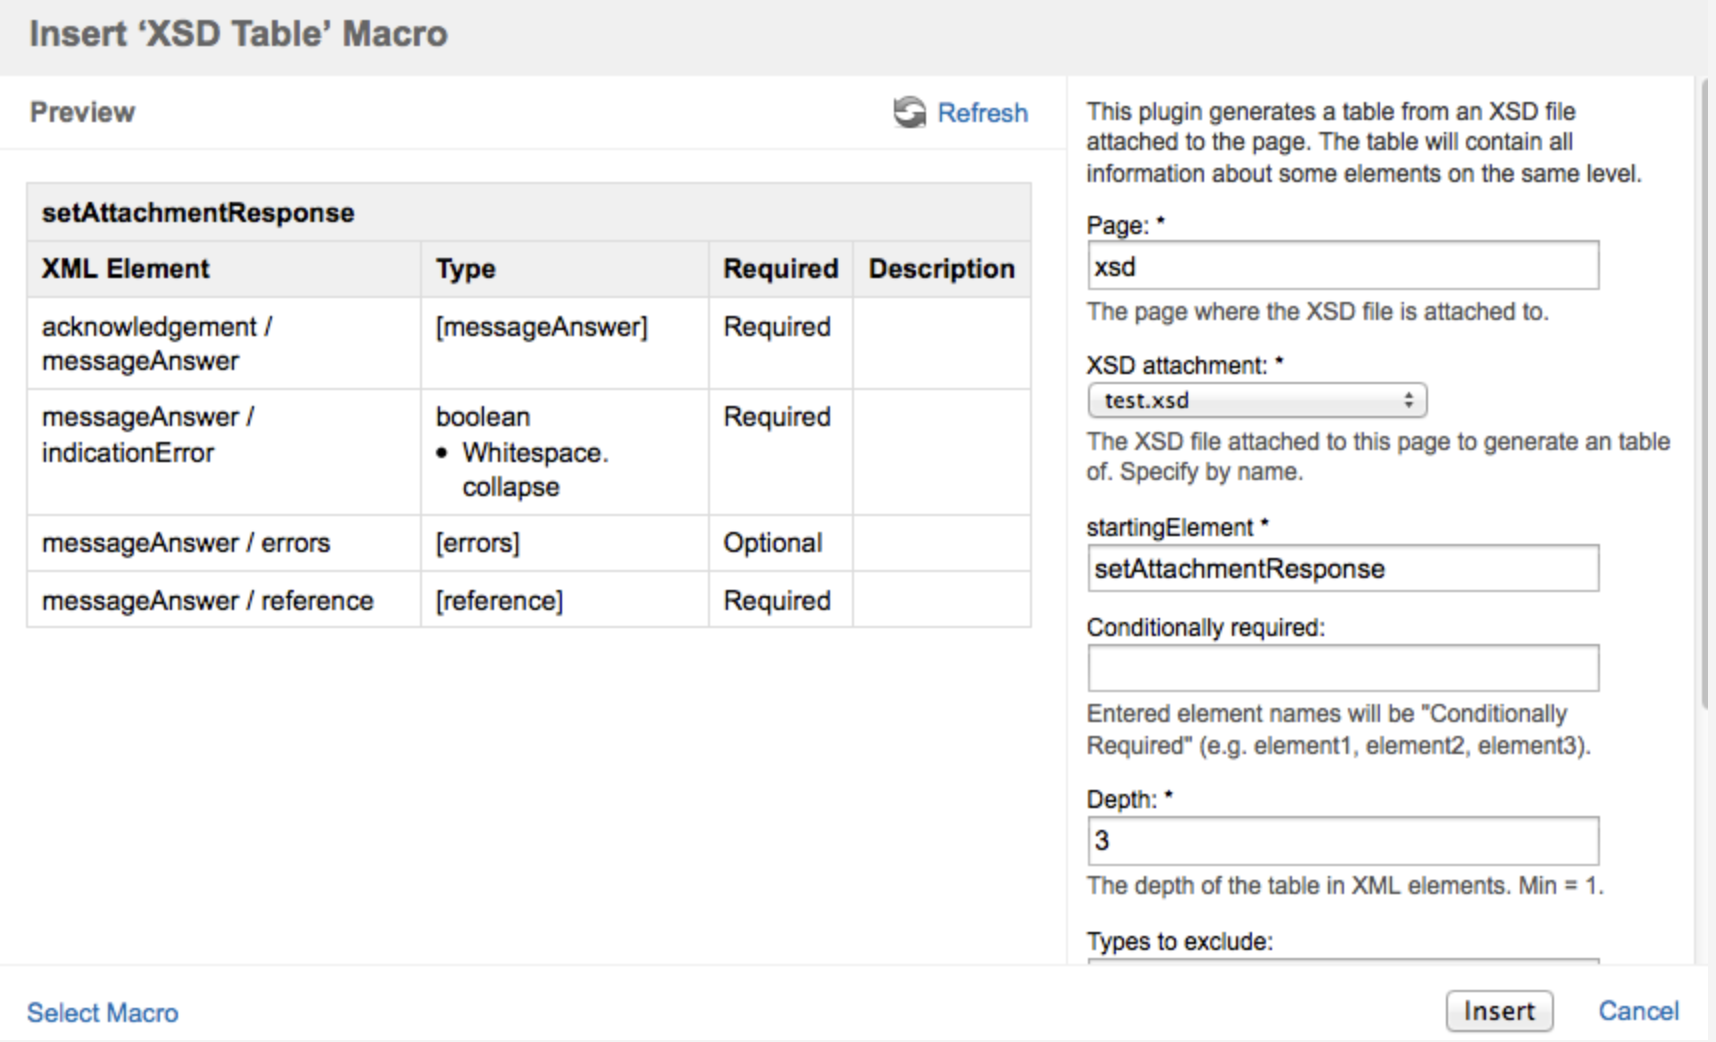
Once you’ve selected the table, the macro panel/browser will show up giving you configuration fields.
Page
Attachment
Starting element
Depth
Types to exclude
3.1 Page
This field has a built in search functionality. By typing the page where you’ve stored the attachment, even outside of the current space, you can select this page.
3.2 Attachment
A dropdown of all the attachments with the .xsd extension on this page will be shown. If no attachments with the .xsd extension are found the dropdown will mention this to you.
{% hint style="info" %} Note: The Atlassian OnDemand version does not yet support the attachment field type, this means that you have to manually enter the xsd filename as a string value. When this is fixed, it will be implemented! It is not possible to link to XSD files hosted elsewhere. {% endhint %}
3.3 Starting element
Starting element is searched in the following order:
Element
SimpleType
ComplexType
3.4 Depth
With the depth field you can configure what point should be described when choosing the table.The minimal depth is 1.
3.5 Types to exclude
In this input field you can configure element types you don’t want to see rendered. This is handy to use when you want to render certain parts only.
4 Example of a full rendered table

