
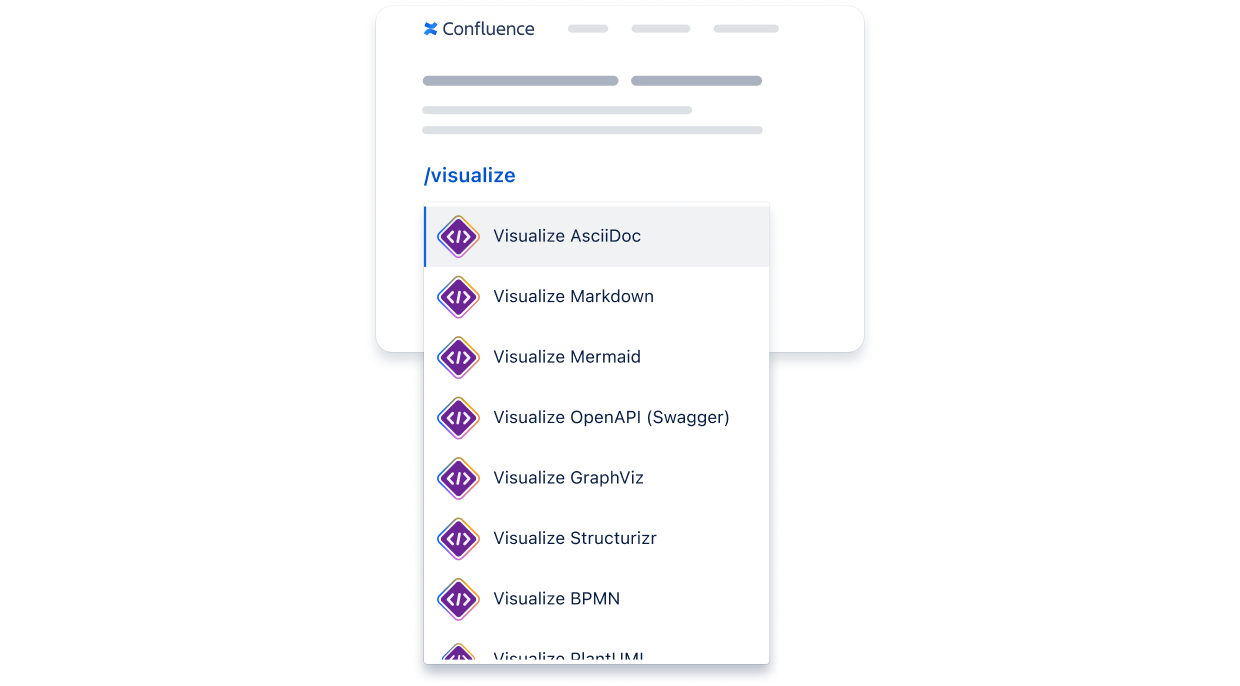
You can add the "Visualizer for Confluence" macro to a Confluence page by typing /[FORMAT], for example /Markdownor /PlantUML.

For all available macro's type /Visualize, Confluence will suggest all macro's for available formats. You can also find an overview of all supported file types here.
Using the Visualizer Editor
Creating Diagrams
Visualizer’s flexible approach ensures you can work the way you want—quickly create diagrams from source code or turn plain ideas into visuals without needing specific syntax.
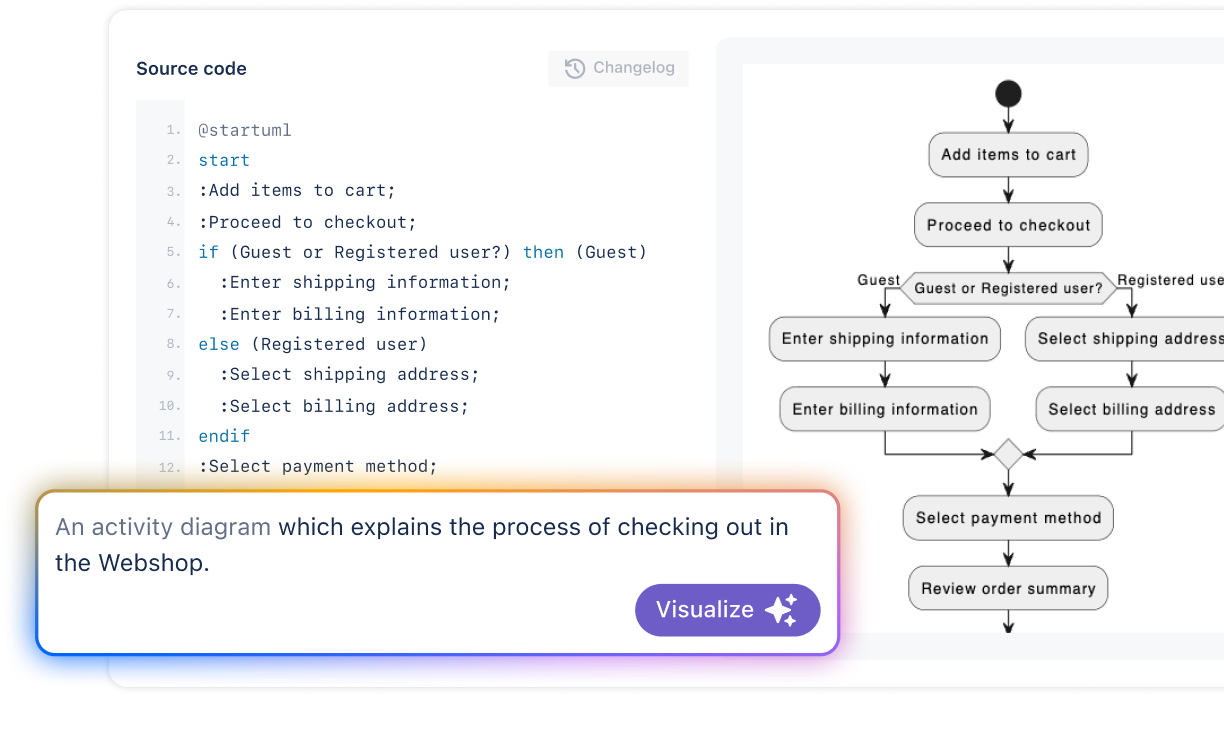
When editing the macro, you can start by using source code or describing your idea.
Start with what suits you:
-
Paste pre-existing syntax, like PlantUML or Mermaid code.
-
Use a template as a starting point to save time and guide your diagram structure.
-
Or, describe your diagram in plain language. For example:
-
“An activity diagram that explains the checkout process in the Webshop.”
-
Edit the diagram using instructions
You can use your own words to add, remove or change steps from your diagram or documentation.
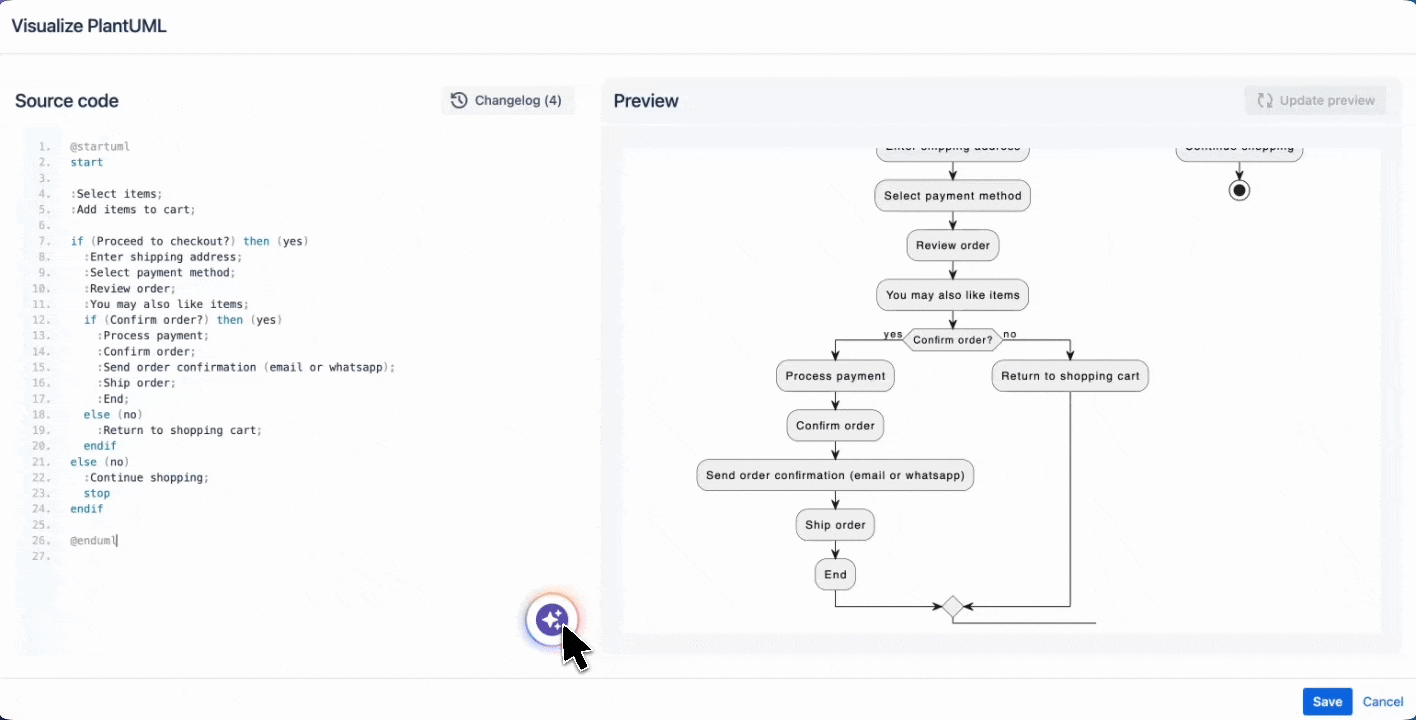
Example use-cases
-
Add a ‘You may also like items’ step after the order review.
-
Change the language of the diagram to German
Visualize and refine:
Select the “Update preview” button to generate or update your diagram.
Continue refining it with natural language instructions or by editing the source code directly.
Insert the diagram:
Use the “Save” button to add the finalized diagram to your Confluence page.
Inserting source code
Visualizer makes embedding and formatting source code easy with syntax highlighting and line numbering for over 30 programming languages. Use the selector to choose your language, and instantly render clean, readable code directly on your Confluence page.

Enhance with Natural Language Instructions:
In addition to pasting code, you can refine it using natural language commands within the Visualizer editor. This makes editing and improving code faster and more intuitive.
Example use-cases
-
Add comments: “Add comments explaining the purpose of each function.”
-
Organize code: “Group the imports together at the top.”
Creating Documentation
Visualizer makes creating and editing technical documentation effortless, right inside Confluence. Whether you’re starting fresh or refining existing content, Visualizer supports the formats you need while letting you work in the way that feels most natural.
Flexible Options to Suit Your Workflow:
-
Write in plain language to quickly build structured documentation.
-
Paste pre-existing docs, and easily update them with natural instructions.
Example usecases:
-
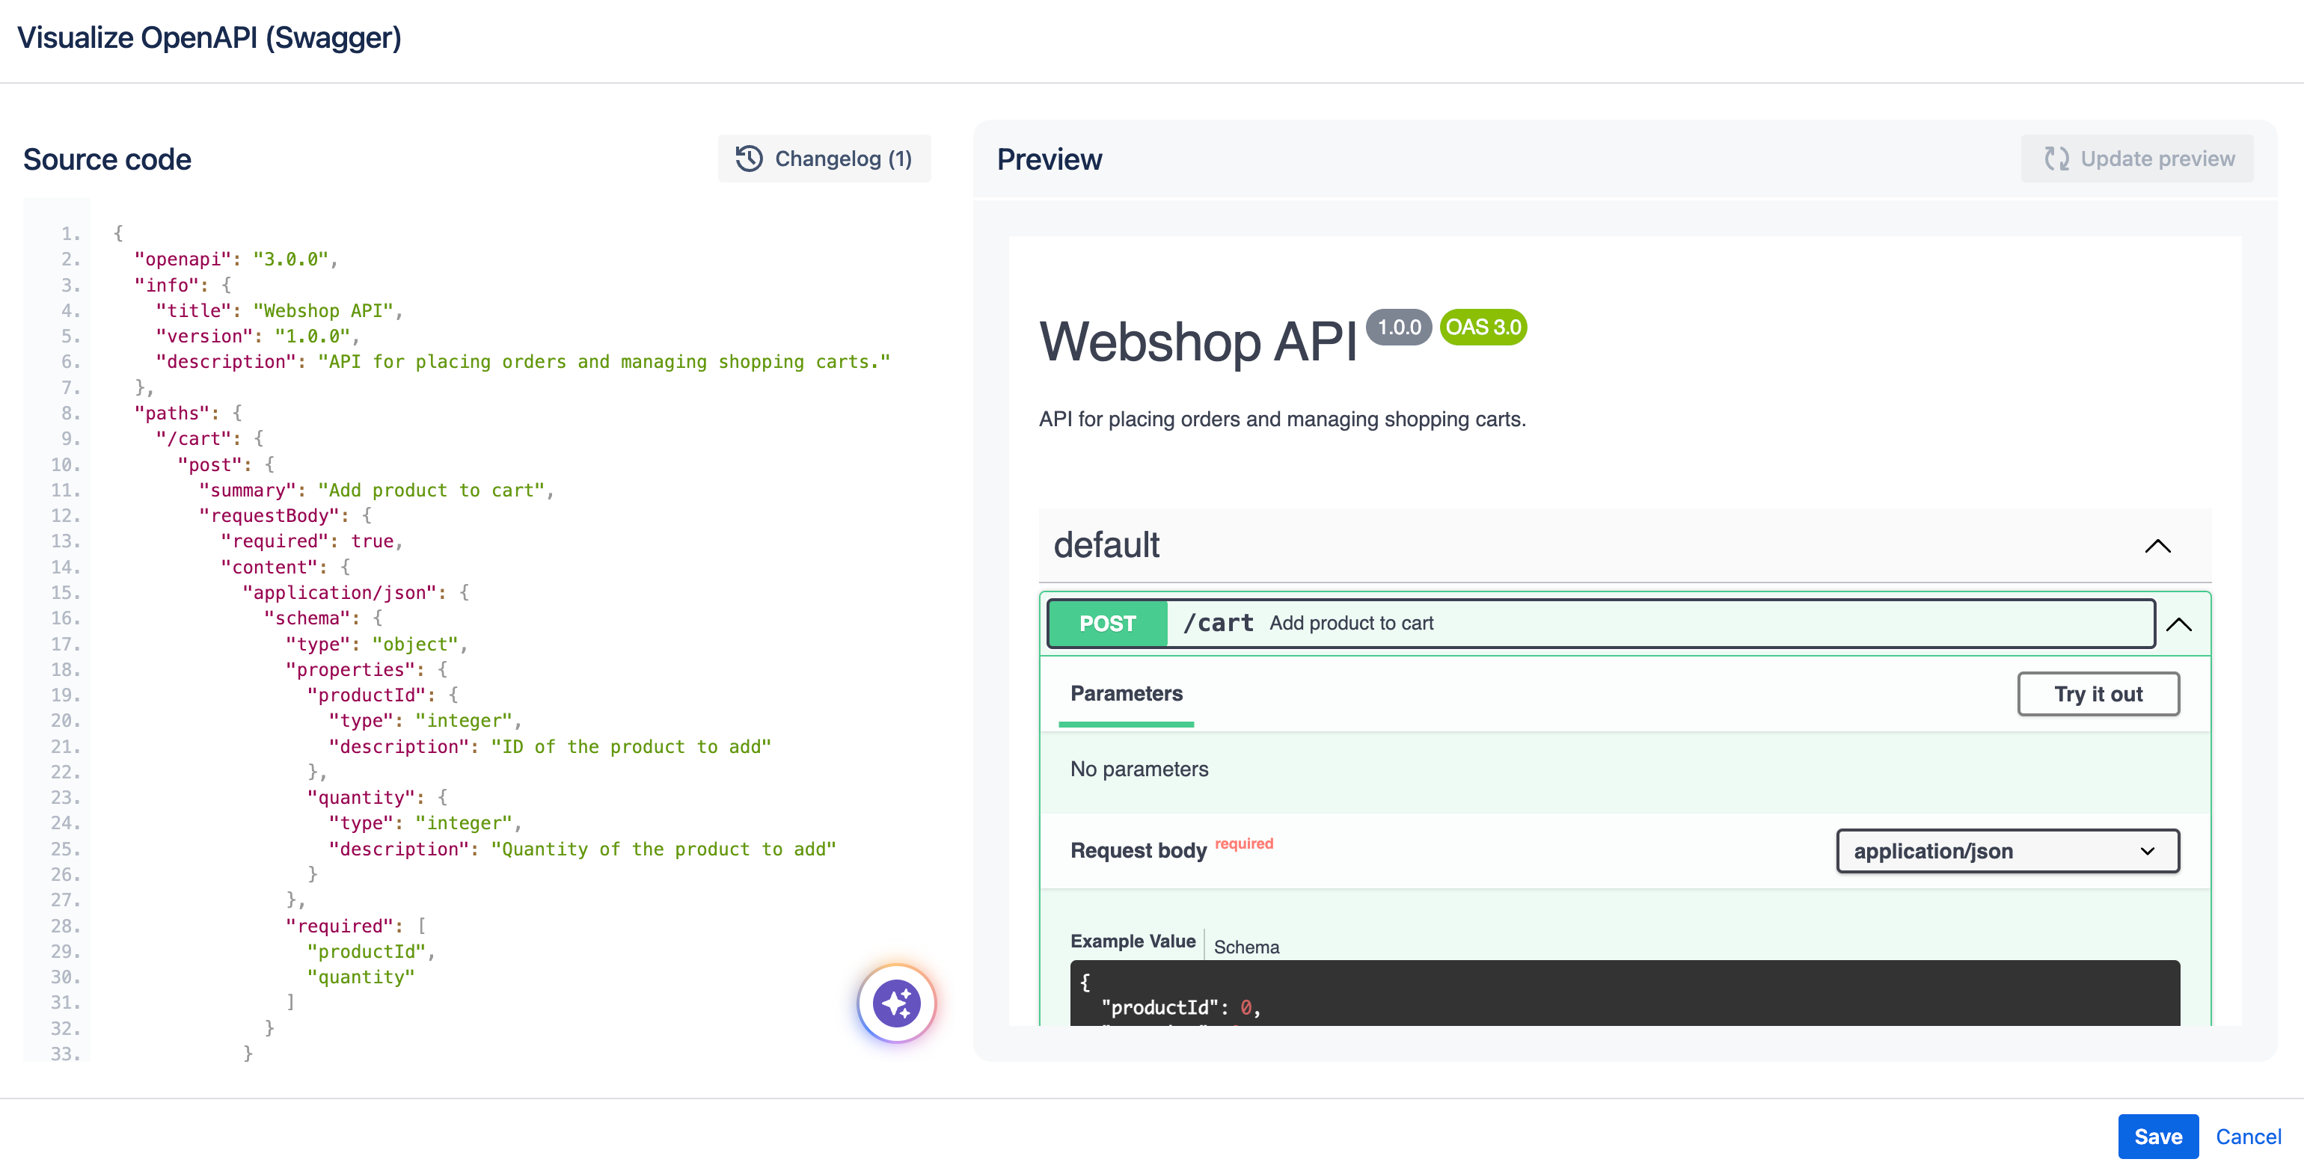
OpenAPI: Define and edit API endpoints, request methods, and response formats.
-
Markdown: Create clean and easy-to-read README files or user guides.
-
AsciiDoc: Draft detailed user manuals with headings, lists, and tables.
-
AsyncAPI: Document message-driven architectures and ensure your events are well-defined.
Visualizer adapts to your needs—whether you’re drafting API documentation, editing system specifications, or sharing guides with your team. By supporting key formats, it streamlines documentation workflows while keeping everything organized in Confluence.
Version Control
Visualizer gives you the flexibility to experiment and refine your diagrams without worry. During an active session, version history is automatically saved, allowing you to go back to any previous version of your work.

This ensures you can iterate freely—whether you’re building a diagram, refining documentation, or organizing source code—without losing track of progress.
Visualizer uses Google Gemini for the generation of diagrams and documentation. Please be aware that this output can sometimes be misleading or incorrect. Use caution and verify the generated content to ensure accuracy and reliability.