Step by step guide
1. Verify your permissions
Before you start, verify that you have Administer projects Permission in Jira. It is required to have these permissions to start using this app in the project of choice.
2. Find Custom Field Values in the project
As a user with Administer projects permissions go to the project settings area.
Choose projects in the menu and navigate to your project.
Choose Project settings.
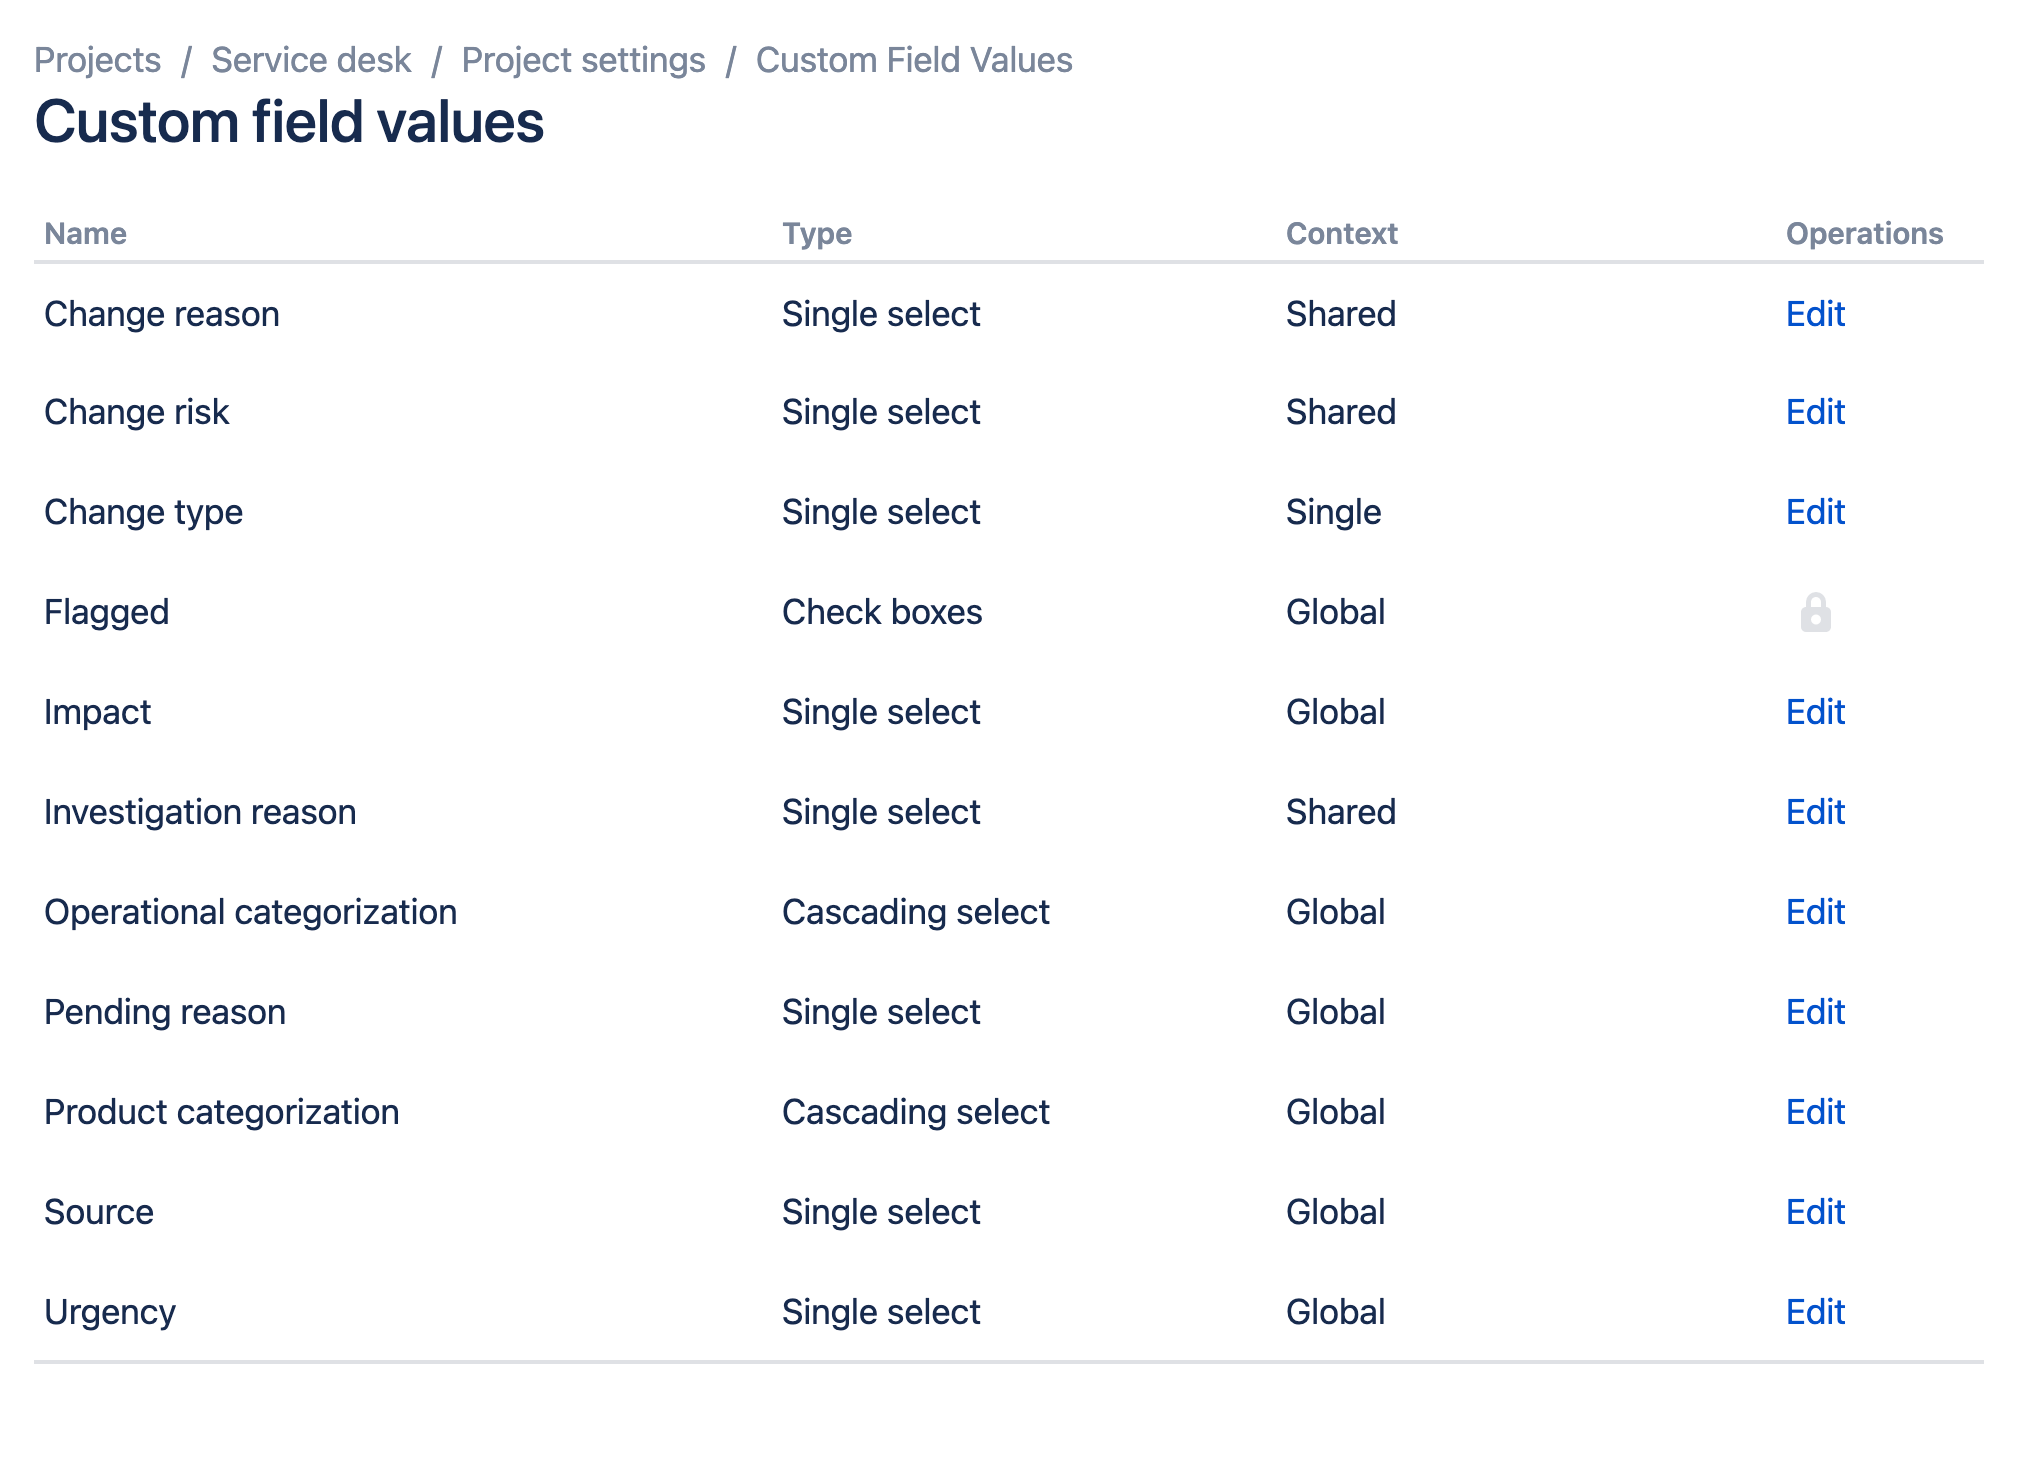
Choose "Custom Field Values" in the menu left.
You will see a list of all custom fields that are used in the current project.
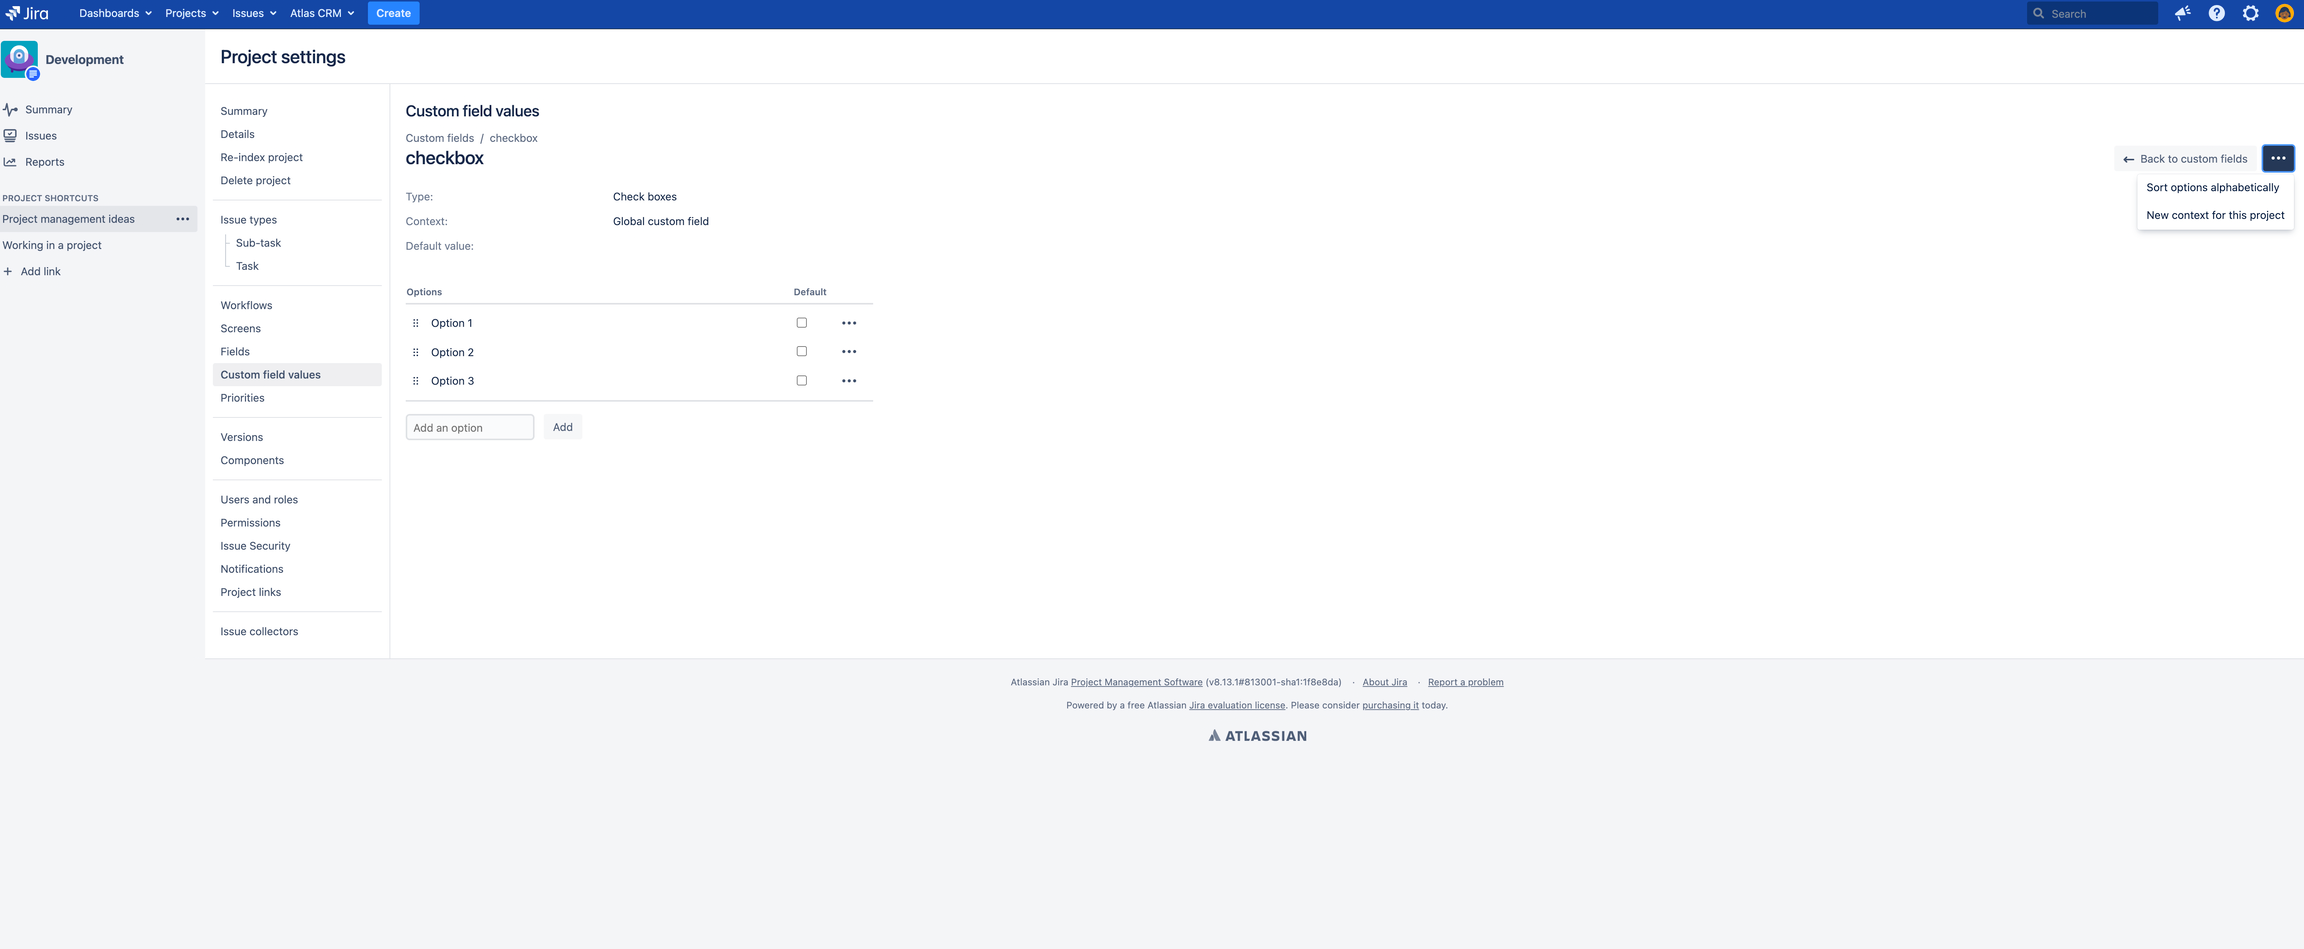
3. Edit your custom field
Choose "Edit" for the custom field you would like to make changes to. Here you can add new values to the custom field, disable /enable fields and set the default value.
4. Options to edit custom fields
There are multiple options to edit custom fields, for example:
Add new options
Set a default value for the field
Drag and drop the order of the field options
Sort options alphabetically.
For each field type there are different options to change.